Saturday, 25 July 2015

Drat, drat and double drat

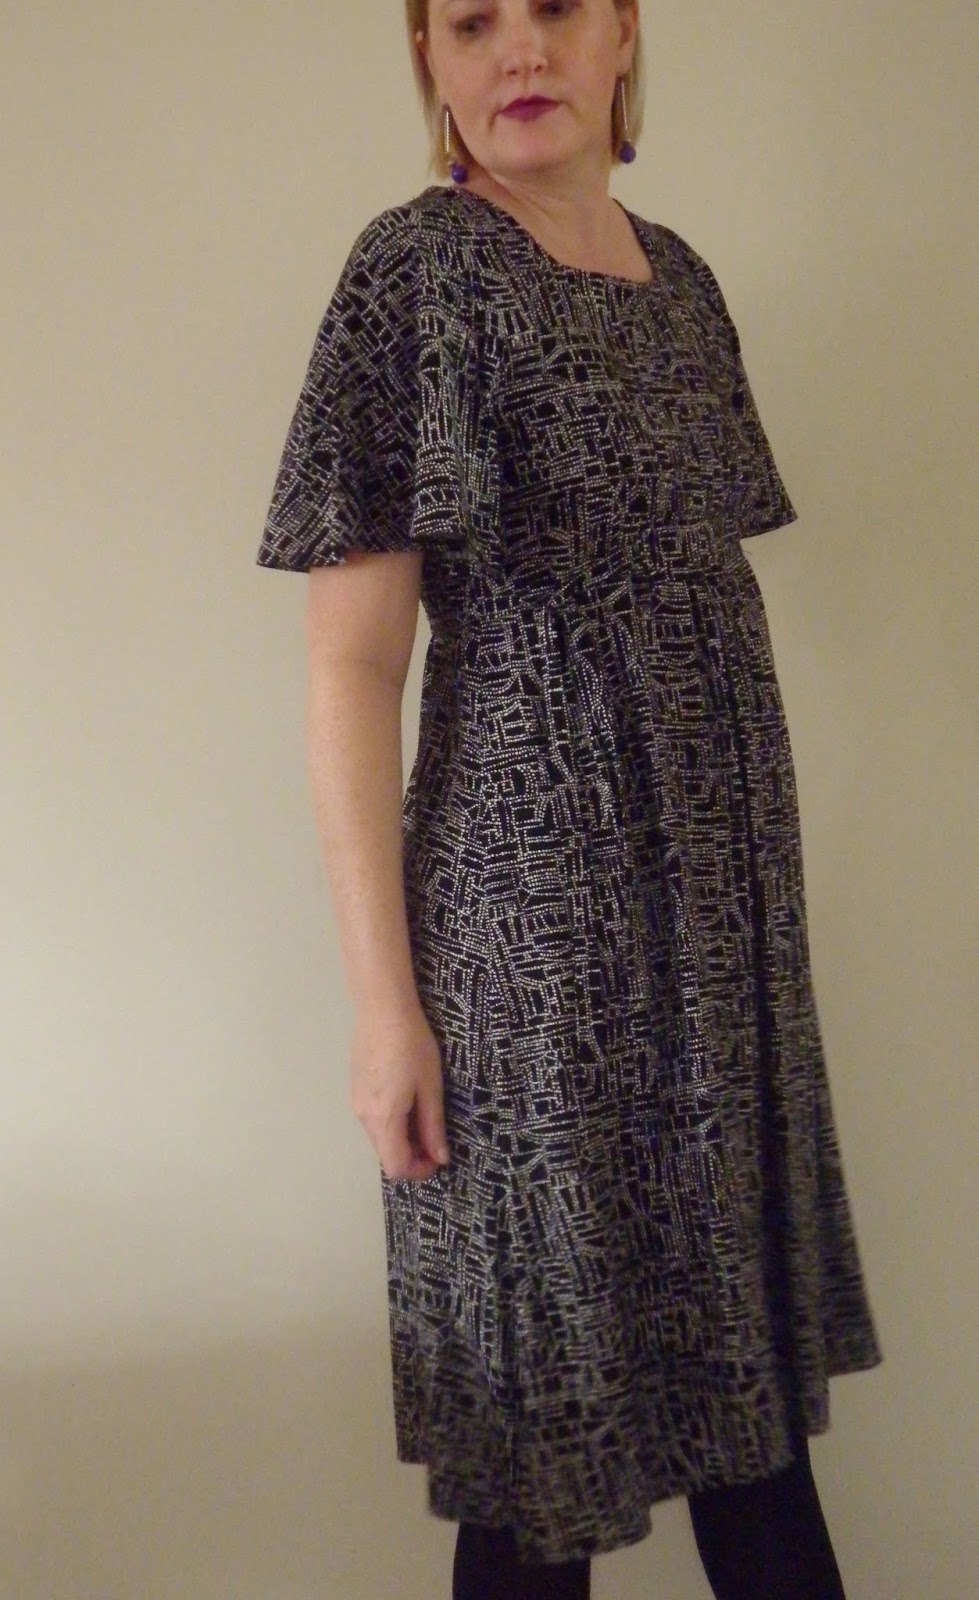
I recently had a run of not so fab sewing adventures and surprising to me they have involved vintage patterns. The first drat was this vintage Butterick dress pattern. I thought an interesting high waist dress, nothing too complicated. And something different with the side ties.  


The material I used was a really nice silky type rayon blend perfect for a flowy dress. I got started on the bodice and after putting in the darts I then looked at the instructions for the facing I got mightily confused. I’d already cut out 4 pieces of the facing thinking, right the outer facing attached to the bodice and the inner facing.  However, there were supposedly 2 more facing pieces to come. The outer facing was supposed to be a border attached to the outside with facing then attached and folded to the inside.  


My main complaint was the fabric for the facing pieces were too small for the pattern. The length and width were out by at least 2cm or more. I held up the pattern pieces to the main bodice pattern and they didn’t match at all.  So I made a seams in both the front and back bodice sections to take them in the desired width as the bodice was pretty loose. Then I tried to put the facing pieces on the outside as instructed but because my fabric was a bit slippery I knew even as I was pinning it that it was going to look totally poohouse.  So I threw away the outer facing and decided just to face the darn thing like you normally would.  However, the bodice pieces were still a bit too small and some puckers formed around the front. Not so noticeable because of the pattern but still really annoying.  The end result is a nice dress but so not worth the trouble. 


I love the flutter sleeves, they worked out really well I think.  Plus I finally got to try out my tube turner kit when I made the ties. 

And to the double drat.

So I was thinking of making a nice shirt to wear with jeans and thought I’d use a 60’s dress pattern and just make a shorter version. Also wasn’t going to bother with the zip as the fabric I chose had a bit of stretch in it.  Well this was all lickety-split coming together. The pattern pieces include the sleeves already attached to the bodice.  So that’s one extra thing not to think about.  The V bit at the front didn’t really work out too well. You are supposed to break the stitch at the centre and voila when you turn the facing to the inside it should sit smooth, but it didn’t, at all. I re-did the stitches and pressed the buggery out of it and it looked passable.  I did the side seams and started to turn up the hem on the sleeves when I thankfully decided to try the top on.  Firstly it was a little snug and given that I wanted to wear it with jeans, this did not bode well.  Secondly one of the corners of the neckline kept flopping forward, even though it is interfaced.  So that was that. Fair thee well funky 60’s top.  Relegated to cupboard of disappointments. 


Wednesday, 15 July 2015

Vintage shift dress strikes again

I think I've made myself a challenge to find the perfect style of shift dress. I've thus far tried quite a few different vintage patterns, most with success I'm pleased to say.  This latest one is slightly different.  The first thing I noticed was that the neckline didn't look it was going to be suffocating me like a lot of the 60's patterns seem to do.  Surely neck sizes weren't that different back in the 1960's.  


The main difference with this dress was the sleeves which were in 2 pieces so you actually have seams running under the arm as well as the upper arm.  And see nice wide neckline for a change. 


It's only in recent years, from using vintage patterns, that I discovered the brilliant instruction of inserting the zip in the back first before attaching the front and back sections together.  I think this technique would work in most straight style dresses, but mostly works well with shifts because they only have one back section, not a bodice and skirt section. Anyways I love how quick and easy it is. Though still haven't tried an invisible zip. One day, one day.


I bought this psychedelic cotton sateen from Spotlight with a shift dress in mind.  I even managed to find some lovely lavender tights on line to match the whole ensemble.  But very annoyance I can't for the life of me find a nice lavender coloured lipstick.  In fact most colours from the family purple are hard to find. 


All in all very enjoyable and easy to make.  The neckline doesn't sit as flat as I would like but it doesn't bother me too much.  Just loving winter and getting to wearing tights.

Monday, 6 July 2015

Simplicity 2472

This is my second time around with the Simplicity 2472.  I was having a bit of a bad sewing weekend recently and after getting the grumps with 3 things in a row I decided I wanted to make up something quick and easy, and that I knew would actually work.  It's the best medicine for a sewing horribilous. There is nothing too fancy about this design. Simply 2 pieces front and back with bias for the neckline and sleeve bands.  You can make it up in a few hours. Easy to make comfy to wear, need I say more. 


The fabric is a 100% cotton from Spotlight.  I don't seem to have a lot of grey in my wardrobe so I was happy to branch out with a nice sublte floral style pattern.  Because the style is so plain, I think I need to make up a nice red necklace to wear. I have some large wooden beads which would be perfect. I'll just add that to my craft projects "things to do".  


Tuesday, 30 June 2015

Frockin Heck

FrankenFrock strikes again.  I wanted to make something with long sleeves, with no fuss zips or buttons.  After success with the Washi dress pattern I thought I'd use the Washi as my basis.  I changed the neckline to make it less scooped and used the sleeves from New Look 6068. The cotton material I bought from Spotlight last year. It's quite a sheer fabric but has a certain stiffness to it.  I just love the olive green colour.


I also decided to gather the front section instead of doing the pleats. Again I just wanted something that was super easy. 


Probably the only disappointing bit to this frock is that the shirring at the back appears a little high. I think it's obvious because of the gathering in the front. Basically if I turn side on it looks like the shirring should be about 2 inches lower. So I shall just avoid being seen side on.


When I look at the finished product it looks like a good basis for a medieval frock. So if I ever do go to a medieval fair I'll be able to whip up a slightly longer version.  


I also just put elastic in the base of sleeves rather than using the facing.

Given the lame Brisbane winter weather I hope I get to wear this before it heats up again.  I planned to wear it last week as I had some birthday celebrations and it was the usual festival of food. This frock would have been perfect to wear if the weather was a tad cooler.  

Sunday, 21 June 2015

Tube Turner

This may not be news to a lot of sewers out there but I recently discovered the simple and yet awsome tool for turning straps and ties inside out.  I've spent many a time sitting watching tv trying to turn out a strap or tie that I've sewn. I've tried the different techniques using a needle and cotton on one end and pulling it through. I've also used my fingers, chopsticks, the end of scissors or whatever was about trying to push through one of of strap/tie.  Then I discovered this simple little kit which is basically some pieces of plastic tubing and with either skinny pieces dowel or metal objects to push the fabric through. So instead of taking me make 30 mins to pull through 4 ties, this all took under 5 mins.


I bought the kit for the Turn it All online at Amazon.


You simply insert the tubing piece into the material. 


And then push the closed end piece through with the dowel.  So wonderfully simple and time saving.  I thought it would be nice to share since I get so much useful information from other sewing blogs.

Sunday, 14 June 2015

Scout Tees

I made my first Scout Tee a few years ago.  This is a super easy top to whip up in a few hours.  My only issue with these type of nice loose fitting t-shirt tops is that I don't have a decent pair of jeans to wear with them.  I have a few pairs of jeans that fit well enough, but there is always too much stretch and once you move in them the waist drops down a smidge and then you've got that whole weirdness around the crotch area. I know I could wear a belt to hold them up, but then I don't really like things restricting me around the stomach.  Hence I don't wear my jeans as much I would like as I only really feel comfortable wearing them with longer tops. The original Scout Tee has had only a few outings.  Again, might just need to whip up a decent straight denim skirt to wear with them.

This first version was made from craft fabric and I embellished it with a nice blue heart shape button which was in my button collection.  I think also, this was the first time I actually made my own bias binding. What a great discovery that was. I did recently buy a bias making kit, but the size of the tape maker is too thin. I bought it online and didn't pay any attention to the different widths you can buy. Though I don't mind just making it up by hand either. 


Not a great photo but PJ looks pretty darned cute
My second version was made very recently. Again just a breeze to whip up. I bought the 100% cotton stripe in a Lincraft sale.  Though for some reason the neckline seems to dip forward instead of sitting flat. It's not too noticeable given the stripe pattern. I wasn't sure about putting the buttons on incase it caused the top to dip forward even more, but since they are small and lightweight it didn't make a different. I really love the buttons.  


Given the way the shirts sit, the choice of 100% cotton isn't exactly ideal. I shall have to try one in a lighter fabric so it gives it a better drape. I just love 100% cotton though being as it's so cool to wear.

I bought some black denim to make a skirt to go with this top. I decided to finally sew the Colettte Ginger skirt pattern.  Quite an easy pattern to make. I went with the plain waistband, but it doesn't sit flat. Very disappointed with the finished product. It is still sitting in my spare room waiting to be hemmed. I just lost interest when I realized it was fail.  Nothing like being a seasoned sewer and failing with a pattern for a beginners. Maybe I'll unpick the waistband and give it another go.   


Sunday, 7 June 2015

Retro Simplicity

This is one of my 60’s patterns that I have had 2 goes at.  The first version of the Simplicity 7129 pattern I made up for a work Christmas party 2 years ago. I knew at the time I wanted to make a second version with the back variation.  The original version had a tie back, which didn’t work so well given the heavy fabric used for the dress.  This time, however, the heavier fabric was a benefit with the backward style collar. Though it does sit out a little at the back making me look like I have wings.  Apart from the sizing being quite large, as most of my vintage patterns have been, it was an easy pattern to adjust down and I don’t mind it being a little roomy. I decided to go without the sleeves as I will get more wear out of a sleeveless dress given our endless summer weather.


The end result is a comfortable and quite striking looking frock. The fabric is a heavy cotton which I bought at Spotlight maybe 3 years ago.  I thought the pattern and colours were quite unique.